

GearAndRig is reader-supported. As an Amazon Associate I earn from qualifying purchases. When you buy through links on our site, we may earn an affiliate commission, at no extra cost to you. Learn more.
To prime an RV water pump, fill the fresh water tank, set valves for normal use, open a cold faucet, and switch on the pump. Most RV diaphragm pumps self-prime. Once water flows steadily, close the faucet and check that the pump builds pressure and stops. If the pump runs but no water appears, switch it off and inspect the inlet path before trying again.
Before you turn on the pump
Priming is about getting water from the onboard fresh water tank through the pump and out of a fixture. It is not the same as using a campground city-water hookup. City water can feed the RV fixtures while the onboard pump stays off, so a working faucet on city water does not prove the tank-to-pump path is clear.
- Fresh water: Add enough potable water for the tank pickup to remain submerged. A tank gauge is only a rough guide, particularly when the RV is not level.
- Pump switch: Leave it off while checking hoses, strainers, and valve positions.
- Winterizing setup: Return the antifreeze pickup or siphon valve to the fresh tank setting according to your RV’s plumbing labels or owner manual. Close open low-point drains and any tank shutoff valve that should be open for normal use.
- Water heater: Do not energize an empty water heater. If the system was winterized, follow the RV and heater manuals for restoring the bypass and filling the heater before turning on its heat source.
If you’re unsure which valve does what, stop and use the specific RV’s plumbing diagram. Rotating unlabeled valves at random can conceal the real problem or redirect water where it shouldn’t go.
How to prime an RV water pump, step by step
- Disconnect or shut off city-water supply for this test. You want to see whether the onboard pump can draw from the fresh water tank, rather than letting pressurized campground water mask the result.
- Verify that the pump can reach tank water. Confirm sufficient water, an open tank feed, and a winterizing selector set to the tank rather than an empty antifreeze pickup hose.
- Open one cold faucet. A kitchen or bathroom cold tap is fine; choose one you can watch without leaving water running unattended. Opening the fixture gives displaced air a way out.
- Turn on the pump. Air may spit from the faucet before the flow becomes continuous. Watch and listen. If no water arrives after a brief priming attempt, turn the pump off instead of letting it run indefinitely.
- When water runs steadily, close the cold tap. A normal automatic-demand pump should build line pressure and shut off. If it continues to run, that’s a separate diagnostic clue, not a reason to keep priming.
- Purge the remaining fixtures one at a time. Run the other cold taps, shower, outdoor shower, and any applicable fixtures until air is cleared. Restore and purge the hot-water circuit only after the heater and bypass are correctly configured per their manuals.
What success looks like: The open faucet gives an even stream rather than spurts, and the pump stops after every outlet is closed. A little sputtering elsewhere can still occur until each branch line has been purged.
The pump runs, but no water comes out: what to check next
A running motor doesn’t confirm that the pump is pulling water. Check in an order that separates a simple valve mistake from a part that actually needs repair.
| What you notice | Check first | What it tells you |
|---|---|---|
| No water after winter storage | Fresh-tank level, antifreeze pickup valve, tank shutoff | A selector left on the winterizing hose can make a healthy pump draw air |
| Pump runs; inlet strainer looks dirty or damaged | Strainer mesh, bowl, seal and fitting | Debris restricts the inlet; a cracked housing or displaced seal may admit air |
| Weak spurts, then nothing | Kinked or flattened suction hose; loose inlet connection | The pump may intermittently lose its water supply or suction seal |
| Water reaches faucets, but pump keeps running | Open fixtures, leak, pressure loss or pump fault | Priming alone is no longer the primary issue |
| Pump makes no sound at all | Pump switch and power supply per the RV manual | This is a no-start problem, not a failed prime |
1. Recheck the winterizing valve before touching the pump
After winterizing, a valve may still connect the pump’s inlet to the loose antifreeze suction tube instead of the fresh tank. That hose can be perfectly clear and still provide nothing but air. Look for labels such as Normal, Tank, or Winterize; different RV manufacturers use different valve layouts. Also confirm the tank shutoff isn’t closed.
2. Inspect the inlet strainer with the pump switched off
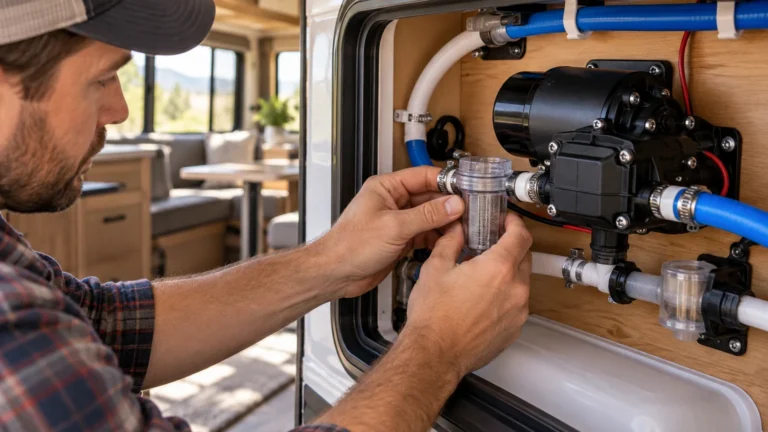
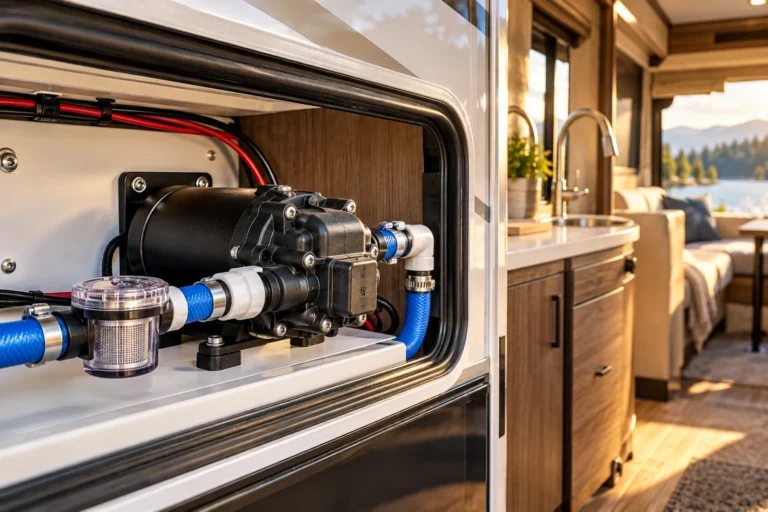
A clear strainer bowl near the pump inlet is often the easiest place to spot debris, a cracked housing, a missing gasket, or a poorly seated O-ring. Turn the pump off, isolate the water supply as appropriate, and put a towel or shallow pan underneath before opening a serviceable strainer. Clean and reassemble only as the strainer manufacturer instructs. Avoid overtightening plastic fittings.
Pentair’s SHURFLO 4008 installation manual specifies a strainer on the inlet and warns that incompatible sealants or excessive tightening can damage its plastic port connections. That guidance is specific to the cited SHURFLO arrangement, not permission to use the same fittings on every pump.
3. Check for air entering the suction line
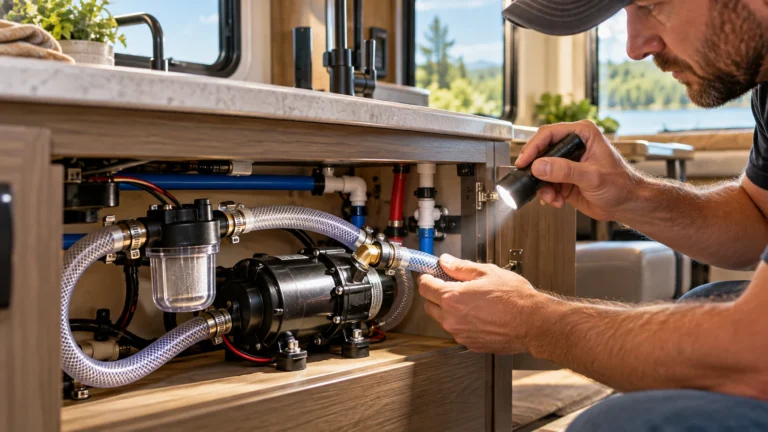
Between the tank and the inlet, look for a loose connection, cracked strainer bowl, collapsed flexible hose, or kink. A fitting can admit air under suction without visibly leaking water onto the floor. If the system has been disconnected recently, check that all fittings and seals were returned to their intended positions.
Do not disconnect pressurized plumbing or work on electrical connections with power applied. If access requires removing electrical covers, altering hard plumbing, or diagnosing internal pump valves, use a qualified RV service professional.
Why priming after winterizing can be different
There are two jobs after winter storage: restoring the water path and clearing air from the plumbing. The pump may fail at the first because the winterizing intake is still selected, even though the motor and diaphragm are fine. Once the valves match the RV’s normal-use diagram, the usual cold-faucet procedure handles the second.
Flush any RV antifreeze from the potable water system and sanitize it according to the RV manufacturer’s instructions before drinking from it. Remove or restore bypassed filter cartridges as directed. Don’t turn on an electric water-heater element or propane burner until the heater is confirmed full and ready for operation.
A newly fitted pump may also encounter an empty suction hose. That does not automatically mean a defective unit: first verify the plumbing path, inlet seal, wiring supply, and installation requirements for that exact model. Don’t assume another model’s dry-run or suction-lift rating applies.
Should you pour water into the pump to prime it manually?
Not as the first fix. Many common RV diaphragm pumps, including the SHURFLO Revolution 4008 family, are designed to self-prime. With water available at the tank and an airtight, unobstructed inlet, manually filling a housing should not normally be necessary.
Some RV guides suggest removing a strainer cup and pouring water in, or forcing city water backward through a faucet. Neither is a universal manufacturer-approved procedure. Backfeeding can stress or bypass components you cannot see, while disassembling a strainer with the pump powered may cause a spill or injury. Use a model-specific manual or service instruction before attempting any manual method. Don’t loosen pump fittings or adjust internal pressure/bypass screws in an attempt to make the pump catch.
When a replacement part makes sense
If the bowl is cracked or its seal cannot seat correctly, an exact-fit inlet strainer is a more targeted purchase than a complete pump. Check the current strainer body and the pump’s inlet connection: threaded and twist-on variants are not interchangeable just because both appear in search results.
The SHURFLO 255-213 is one documented strainer family used in RV water systems, but it is not an automatic match for every SHURFLO pump or fitting. Compare the connection style and exact part number before ordering.
Check the SHURFLO 255-213 strainer on Amazon
Consider an entire pump only after the tank feed, valve settings, strainer, inlet plumbing, and power supply have been ruled out. The 12V SHURFLO Revolution 4008-101-E65 is a documented example, not a universal drop-in replacement. Confirm voltage, mounting clearance, plumbing connections, electrical protection and the specifications of your original unit.
Check the SHURFLO 4008-101-E65 pump on Amazon
Best next move: If water starts flowing after correcting a winterizing valve or cleaning an intact strainer, don’t buy a pump. If the same air-loss problem returns after reassembly, inspect the suction-side seals and hose before replacing anything expensive.
Frequently Asked Questions
Do all RV water pumps need to be primed by hand?
No. Many RV fresh-water diaphragm pumps are self-priming, so the usual approach is to supply water from the tank and vent air through an open faucet. Check the exact pump manual before attempting to add water directly to a housing.
Can I prime the RV pump while connected to city water?
City water may pressurize the fixtures without the onboard pump drawing anything from the tank. For a meaningful tank-to-pump priming check, isolate the city-water supply using your RV’s normal procedure, then test from the fresh tank.
Why does the RV pump lose prime again after I fix it?
If it works briefly and later struggles to draw from the fresh tank, look for an intermittent restriction or an air leak at the inlet strainer, suction hose, or its connections. Follow the pump maker’s troubleshooting instructions if those visible checks do not identify the fault.
Will opening the hot faucet help prime the pump faster?
Begin with a cold faucet so you can confirm basic flow without confusing the result with the water heater’s volume or bypass setting. Open hot-side fixtures only after the heater is correctly reconnected and filled per its operating instructions.